How to Swap Tokens on Atmos
This section provides a comprehensive, step-by-step guide to swapping tokens on Atmos Protocol, utilizing the Swap Aggregator powered by multi-fork routing. Follow these detailed instructions to ensure maximum efficiency, safety, and transparency for every swap.
Overview
- Atmos Swap Aggregator offers optimal routing by connecting all available liquidity pools and DEXes, ensuring you get the best price with minimal slippage.
- Supports In-Out (recommended for efficiency) and Out-In swap flows.
- Strict token curation: You can only import custom tokens at your own risk.
Prerequisites
- Supported wallet: You must have a Starkey Wallet with assets on Supra.
- Official dApp: Only trust the app at https://app.atmos.ag/.
Step-by-Step Swap Flow
1. Access Atmos Protocol dApp
- Go to https://app.atmos.ag/.
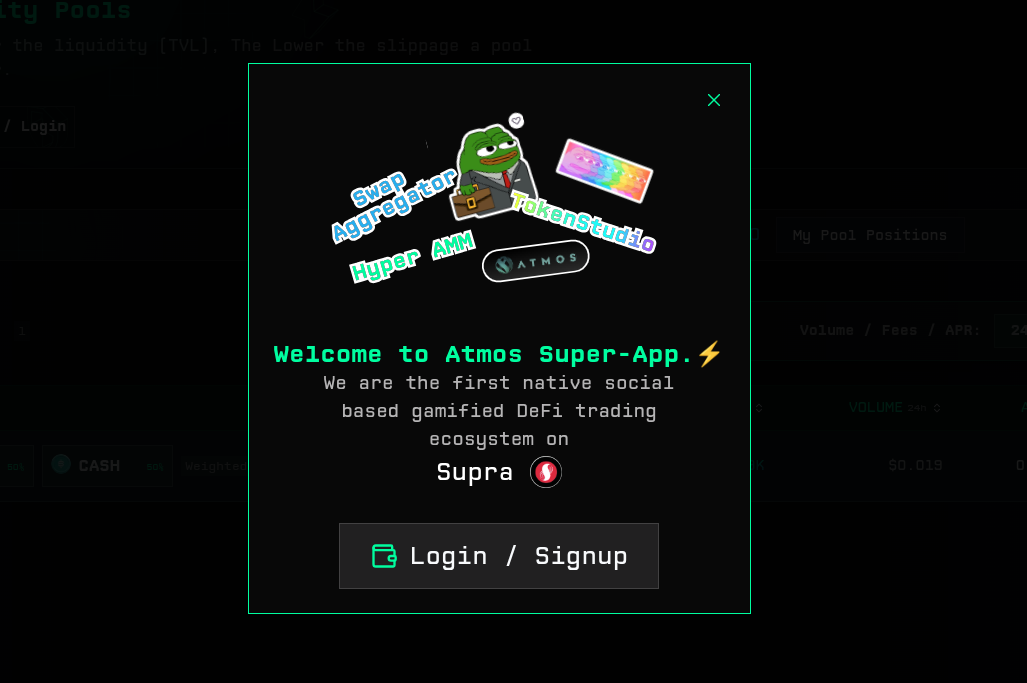
- Click Login / Signup when prompted by the welcome screen.
2. Connect Your Wallet
- Approve connection using your Starkey wallet.
- A pop-up from Starkey should request approval—accept it.
- Your wallet address appears on the interface when connected.
3. Navigate to the Swap Feature
- From the left sidebar menu, select Swap to open the Swap interface.
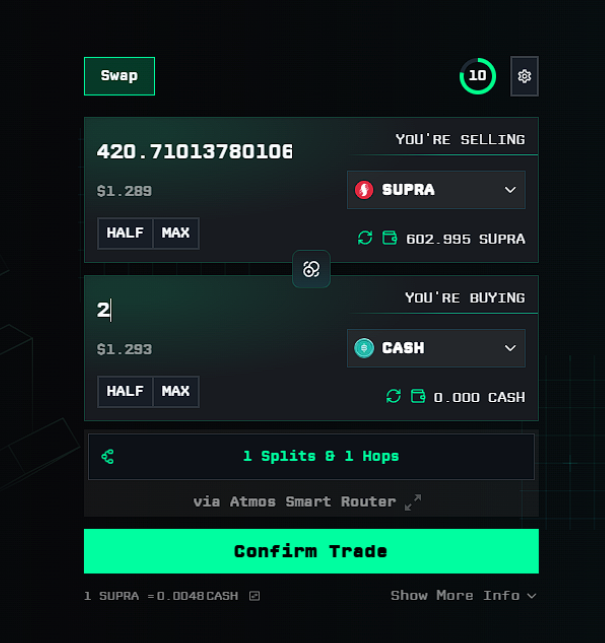
- The swap card will be displayed, showing You're Selling and You're Buying fields.
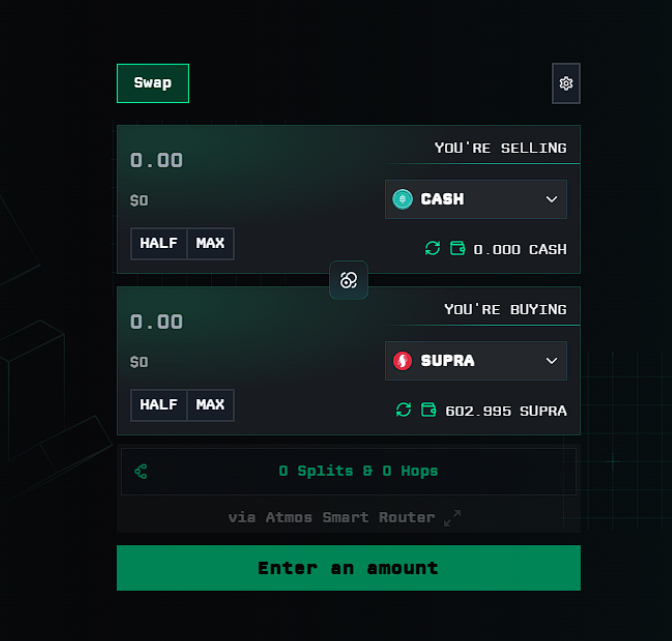
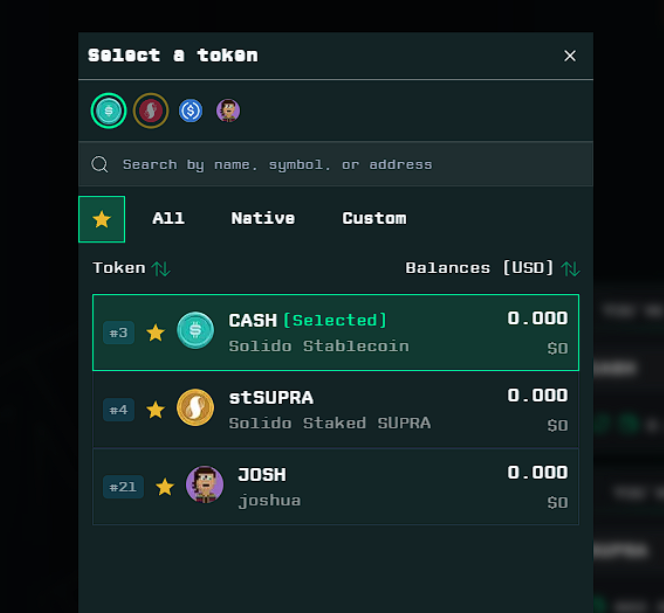
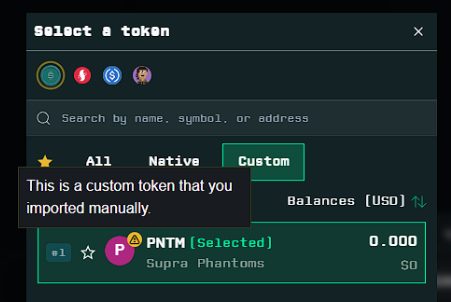
4. Selecting Tokens
Token selection is highly customizable:
- Click on the token dropdown (for either selling or buying fields).
- Use the tabs to switch between curated lists:
- All: All popular tokens
- Native: Network-native assets
- Meme: Trending meme tokens
- Custom: Tokens you've imported yourself
- Use the search bar above the list:
- Type name, symbol, or contract address.
- Tip: For safety, always use the contract address to avoid confusion between similarly-named tokens!
- To favorite a token, click the star beside its name. Access all favorites from the Favorites tab for fast, repeat trading.
5. Choosing Swap Mode
Atmos supports three primary swap flows:
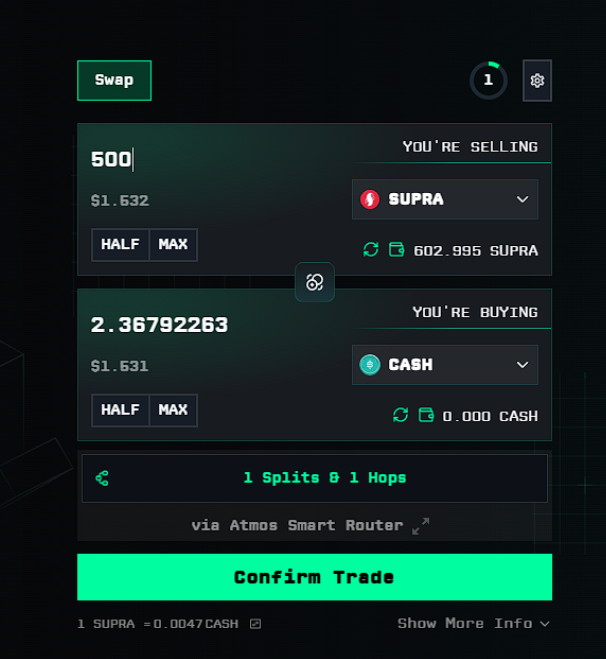
A. In-Out Swap (Recommended for Best Efficiency)
- Enter the amount you want to sell (top "You're Selling" field).
- The aggregator maximizes your output by splitting the swap optimally across liquidity routes and pools.
- This mode achieves the best exchange rate.
B. Out-In Swap
- Enter the exact amount of the token you want to receive (bottom "You're Buying" field).
- The system calculates the sell amount required.
- Note: Routes for Out-In swaps may not be as optimized as In-Out, especially for larger swaps for pairs with less liquidity.
C. Swap & Send to Another Wallet
How it works:
- Swap any supported tokens and send the result directly to an alternative wallet address.
How to use:
- Go to Settings (gear icon on swap panel).
- Enable Send to a different wallet.

- Save settings.
- Enter the recipient's wallet in the new field shown below the swap form.
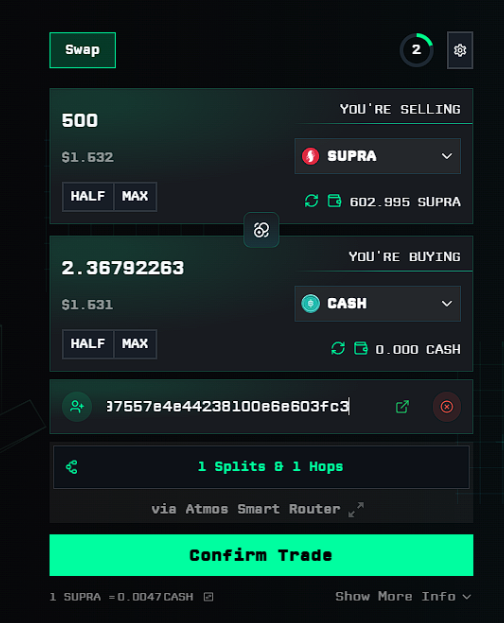
- Review that the address is entered correctly (double-check for security).
- Execute your swap; on completion, the output is sent directly to the specified wallet.
⚠️ Important: All advanced rules and security prompts apply as with any swap; never send assets to untrusted addresses!
6. Additional Swap Features
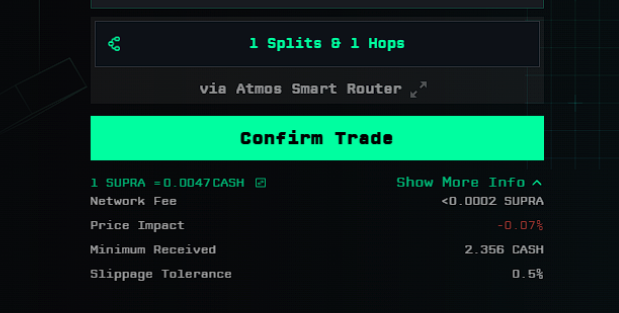
Splits & Hops Visualization
- Click Splits & Hops beneath the swap card to view the precise route:
- Shows every DEX, pool, and % split of your trade route.
- A higher number of hops/splits can reflect a more efficient aggregated route.

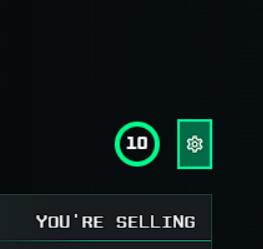
Countdown Timer (Live Price Refresh & Manual Refresh)
- The countdown timer at the top right of the swap card keeps your price quotes and routing up-to-date by automatically refreshing every cycle (every 10 seconds).
- Manual Refresh: You can click directly on the timer at any time to immediately refresh the price and routing data. Doing this also resets the timer to 10 seconds, allowing you to get the latest rates on demand—perfect for volatile market moments.
Swap Settings
Use the gear icon to adjust settings:
- Slippage Tolerance (Auto, 0.1%, 0.5%, 1%, custom)
- Swap and send to another wallet toggle
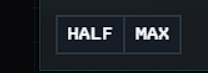
HALF / MAX Buttons
- Use these to instantly fill half or all of your token balance.
Show More Info
Expand this section under the swap form for advanced metrics:
- Network fee (gas, paid in native token)
- Price impact (how much your swap moves the market)
- Minimum received
- Current slippage setting
7. Executing the Swap
- Double check token selections, amounts, and routing.
- Review advanced info and split/hop details as needed.
- Click Confirm Trade.
- Approve the transaction in your Starkey wallet.
8. Token Import and Safety
- By default, only a curated token list appears.
- Import custom tokens only after careful verification of contract address—Atmos does not validate imported tokens for you and shows a warning.
- If you see "Route Not Found", this means that the token has very low to no liquidity.
9. Common Errors and Troubleshooting
- No route available: Swap size too large/illiquid—try reducing amount or using more liquid pairs.
- Token not found: Double check contract address or wait for token approval/listing.
- Wallet connection fails: Ensure Starkey is unlocked and on the correct network.
- Transaction fails: Review slippage, minimum received, and ensure you have enough gas.
10. Safety and Best Practices
- Always verify contract addresses.
- Prefer In-Out Swap for most trades.
- Use "Show More Info" to understand swap quality and potential slippage.
- Only use the official dApp and wallet for swaps.
11. Support and Feedback
For help, visit the Atmos Knowledge Base or join the Atmos Discord.